

Designing Your Own Henna Patterns
Henna body art is an ancient tradition, deeply rooted in South Asia, North Africa, and the Middle East. If you're looking for a creative outlet, designing your own henna patterns can be surprisingly rewarding.
Getting Started: A Step-by-Step Guide
Here's what you need to know:
1. Gathering Your Supplies
You’ll want henna powder, essential oils (tea tree or lavender work well), lemon juice or water for mixing, applicator cones or bottles, paper towels for cleanup, and design templates to get you started.
2. Understanding Traditional Motifs
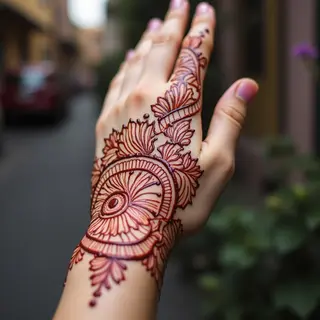
Traditional henna designs often carry symbolic meaning—fertility, happiness, protection—and frequently feature paisleys, flowers, vines, and geometric shapes. It's worth exploring the cultural variations for inspiration.
3. Sketching Your Design
Begin by sketching your design on paper. Think about where you’ll apply it—hands, feet, arms, or legs are all popular choices. Start with basic shapes and build complexity from there; templates can be a real help when you're learning.
4. Creating the Henna Paste
Mix the henna powder with your essential oils and lemon juice or water to create a thick paste. Then, let it sit for several hours—or even overnight—to allow the dye to fully develop.
5. Applying Your Design
Fill your applicator cone or bottle with the prepared henna paste. Practice on paper first, then apply it to your skin in smooth, confident strokes, following your sketched design or template.
6. Drying and Removal
Let the henna paste dry completely—usually takes about 20 to 30 minutes. Once it’s dry, gently scrape off the excess with a credit card or similar tool. The stain will gradually darken over the next 24 to 48 hours as it develops.
Tips for Beginners
Start with simpler designs and work your way up. Don't be afraid to experiment—and remember, practice really does make perfect!