
Creating Henna Designs: A Step-by-Step Guide
Henna tattooing is a delicate art form—it really does demand precision and patience, qualities I value immensely. Even just sketching out the design before you pick up the cone takes dedication.
Getting Started: Your Tools & Inspiration
First things first, gather your supplies. You'll need paper, a pencil (a fine tip is best for detail), an eraser, and some references to work from. I often browse Pinterest or Instagram—or look at traditional henna designs—to get ideas flowing.
Building Blocks: Basic Shapes
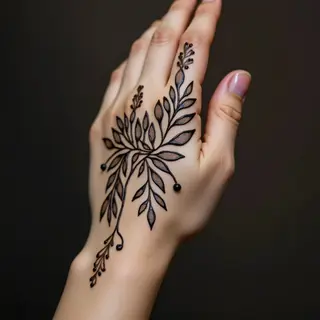
Henna patterns are built from repeating motifs. Think dots, teardrops, circles, diamonds—even simple floral elements. Spend some time practicing these shapes individually; a little accuracy here makes a big difference in the final result.
The Framework: Laying Out Your Design
Next, sketch out your overall design using larger geometric shapes. Consider it a blueprint for the pattern you’re creating. Symmetry is common in traditional designs, so keep that in mind as you plan.
Adding Detail: The Artistry
Once your framework is established, it's time to add the details. This is where the artistry really comes alive—incorporate vines, leaves, paisleys, or any motifs that speak to you.
Refinement: A Critical Eye
Step back and really look at your design. Does anything feel unbalanced? Do the lines flow well? Erase any unnecessary marks, refine the details—until you’re happy with what you see.
Transferring Your Design
Carefully transfer your design onto skin. You can use a stencil, or try freehand drawing. Remember: practice makes perfect—don’t be afraid to experiment!
Precision is key. A steady hand and careful observation are essential for creating beautiful henna designs.