
Simple Mehndi Designs: A Beginner's Guide
Simple mehndi designs are a wonderful way to appreciate the beauty of henna art, especially if you’re just starting out or short on time. The back of your hand makes a lovely canvas for these delicate patterns.
Understanding Simple Mehndi
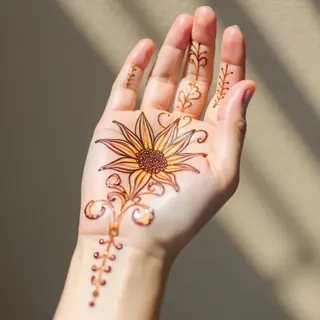
These designs generally use minimal, less intricate details—think dots, lines, curves, and basic floral shapes. They’re much easier to create than complex traditional patterns and have a really elegant charm when done well.
Design Ideas
Consider teardrop shapes, connecting dots in a chain, simple leaf designs, or even just one flower with delicate swirls. A few paisleys can really elevate the look too.
Step-by-Step Guide (Basic Dot & Line Design)
Here's how to create a simple dot and line design:
-
Prepare Your Hand
Clean and thoroughly dry the back of your hand.
-
Start with Dots
Using a mehndi cone or applicator, place dots along the edge of your hand, spacing them evenly.
-
Connect the Dots
Gently connect these dots with thin lines to create a simple chain-like pattern.
-
Add Simple Swirls
Incorporate small swirls around the lines for added visual interest.
-
Let it Dry & Develop
Allow the mehndi to dry completely (around 2–3 hours). A natural stain will develop over time, deepening in color.
Tips for Beginners
Practice your designs on paper first. Don't be afraid to experiment with different shapes and spacing! And, of course, use a good quality henna paste for the best results.