

Getting Started with Mehndi: Simple Design Tricks
Mehndi, or henna, is a beautiful ancient art form used to adorn hands and feet for celebrations. It’s easy to feel overwhelmed at first, but creating stunning designs can be surprisingly simple! This guide shares some straightforward mehndi design tricks to help you begin.
Understanding the Basics
Let's start with a few essentials. Getting these right makes all the difference.
Mehndi Paste Consistency
The perfect consistency is key – it shouldn’t be too runny or too dry. You want a paste that sticks to your skin and creates a smooth, even line.
Tools of the Trade
While traditional cones are common, stencils can be incredibly helpful when you're just starting out. Fine-tipped pens also work well for outlining – experiment and see what feels best!
Simple Design Tricks
Now, let’s get to the fun part. Here are a few easy techniques you can try.
The Dot Method
Start with dots! They're incredibly versatile and form the basis of so many patterns. Try creating circles, teardrops, or lines—all using just dots.
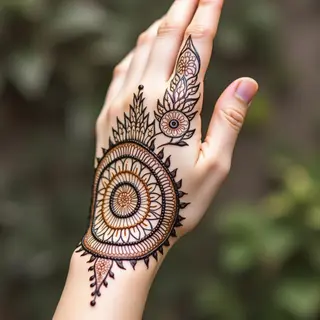
Leaf Patterns
Leaves are a classic mehndi design element. Practice drawing simple leaf shapes; you can arrange them in vines or clusters for a beautiful effect.
Geometric Shapes
Squares, triangles, and diamonds offer structure and visual interest. Combine these shapes with other elements to create truly unique designs.
Stencil Assistance
Don’t be afraid to use stencils! They're a fantastic way to achieve symmetry and more complex patterns when you’re learning.
Outline First
A helpful tip: start by sketching the outline of your design using a light pencil. Then, fill in the details with mehndi paste.