

A Beginner's Guide to Creating Simple and Gorgeous Henna Tattoos
Henna tattoos are a beautiful form of body art with ancient roots in various cultures. While intricate designs can be stunning, they don't have to be intimidating! This guide is for beginners looking to create their own simple and gorgeous henna patterns.
What You’ll Need
- Henna Tattoo Paste (Natural, brown color – avoid ‘black henna’ which contains harmful chemicals)
- Applicator Bottle or Cone
- Paper Towels/Cotton Swabs
- Lemon Juice & Sugar Solution (to help the paste adhere and last longer)
- Design Stencils (optional for beginners)
Easy Design Ideas
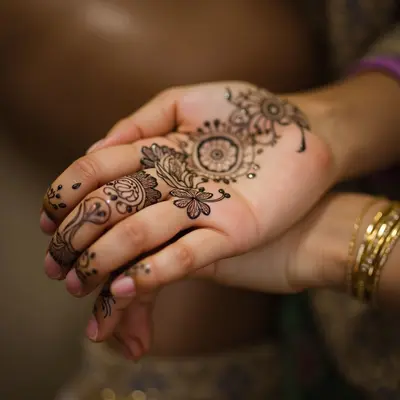
Simple Floral Motifs: Basic flowers, leaves, or vines are easy to trace or freehand. Geometric Patterns: Dots, lines, triangles – these can be combined to create unique designs. Mehndi-Inspired Shapes: Hearts, circles, and teardrops are classic and beginner-friendly. Finger & Toe Designs: Small, delicate patterns on fingers and toes are a great starting point.
Application Tips
- Clean the skin thoroughly before applying henna.
- Apply the henna paste in smooth, even layers.
- Allow the paste to dry completely (usually 20-30 minutes).
- Gently scrape off the dried paste.
- Apply lemon juice and sugar solution to moisturize and seal the design.
Aftercare
- Avoid water for at least 1 hour after removing the paste.
- Keep the area moisturized with natural oils (coconut or olive oil).
- Don’t expose the tattoo to harsh chemicals or direct sunlight.